Chimney Sweep

What Does a Chimney Sweep Do?

Imagine opening your front door to see a black-suited, top-hatted chimney sweep waving an official-looking document in your face. The sweeper has a dustpan and brush in his hand. In the 1700s, boys as young as four or five were apprenticed to chimney sweeps. It was a terrible exploitation.

clean chimney sweep

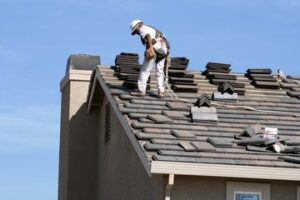
Clean Chimney Sweep Charleston ensures chimneys, fireplaces, and flues are structurally sound. They also provide they are free of obstructions like creosote, which can be a fire hazard. Sweeps must be prepared to climb ladders in all weather conditions and use the right safety equipment, including insulated ladders. They also work with harmful, flammable substances that require proper respiration, so a good level of physical fitness is important.

Sweeps must be familiar with NFPA (National Fire Protection Association) standard 211. The national common states, “Chimneys, fireplaces, and venting systems shall be inspected at least once a year for soundness, freedom from deposits, and proper clearances. Cleaning, maintenance, and repairs shall be made as needed.”

During a level one inspection, a chimney sweep will visually inspect the easily accessible portions of a chimney’s interior and exterior. They will not need specialized tools to open doors or panels; no demolition will be required.

A level two inspection includes everything in a level one inspection, but the sweep will also use a video scanner to examine a chimney’s internal structures and joints. Specialized tools, including demolition equipment, are not used for a level two inspection.

A level three inspection includes all items in levels 1 and 2, but the sweep will also use specialized tools to access concealed areas of the chimney and flue structure. This location may be hidden by permanently attached coverings, such as a roof or a chimney chase cover. Homeowners need to know that there are different levels of inspections because the CSIA recommends a certain level of examination depending on the type of chimney and the use of the system.

This level of inspection focuses on the exterior and interior of all accessible chimney components, including flue liners. It does not require specialty tools to open doors, panels, or coverings.

During a level two chimney inspection, the technician will use closed-circuit video scanning to inspect the interior of your flue and chimney lining. It will also help your chimney sweep spot problems that a visual inspection might miss.

If something has changed in your chimney system, such as a change in the fuel you burn, a new fireplace appliance with a different input rating or efficiency level, or a renovation that altered the structure of your fireplace, a level 2 inspection is required. This type of chimney inspection is also recommended if your chimney has suffered damage. It could be from a natural calamity, chimney, or general structure fire.

A level two inspection includes everything that a level one inspection does but also involves inspecting other parts of your home close to your chimney. It may consist of attics, crawl spaces, and basements. It will also address proper clearances from combustible materials in those areas.

A Level 2 inspection can be time-consuming and labor-intensive, so hiring a chimney sweeper with the right skills and experience is important. A qualified chimney sweeper will be certified by a professional organization, such as the Chimney Safety Institute of America (CSIA) or the National Chimney Sweep Guild (NCSG). They should have extensive training in identifying and preventing chimney hazards and be able to understand and interpret fire codes and building standards thoroughly. They should also be comfortable working on roofs and in tight, confined spaces.

The National Fire Protection Association recommends that homeowners inspect their chimneys regardless of burning frequency. This recommendation is based on the fact that wood when burned, generates a byproduct called creosote. This byproduct accumulates in the chimney and flue if the wood isn’t completely burned or the combustion process needs to be properly maintained. The accumulation of creosote can cause a vent to be obstructed. This hazard can lead to fires and carbon monoxide poisoning.

A level three inspection will include a detailed examination of the exterior portions of the chimney accessible from the attic and roof, as well as basements and crawl spaces. It will also address the proper clearance of combustibles from these areas of the duct and flue. The inspection may require the removal or destruction, as necessary, of permanently attached portions of the chimney and building structure to gain access for evaluation and repair.

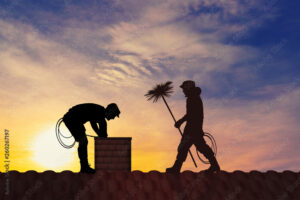
Chimney sweeps evaluate, clean, and maintain fireplaces, wood stoves, gas fireplaces, and chimneys. Many chimney sweeps are certified by professional organizations such as the CSIA or the NCSG and are held to a high standard of practice and ethics. It is a highly technical field requiring specialized equipment to complete the job safely.

Homeowners must prepare their homes before a chimney sweep arrives by moving any furniture or decorations that may block the path to the fireplace and flue system. Chimney sweeping is a messy job and is often performed outside of the home, so it is recommended that homeowners use drop cloths in their work area to decrease the amount of soot that ends up inside the house.

Chimneys can be easily neglected, but if they’re not cleaned regularly, they pose a real danger to the health of a home’s residents. That’s why scheduling regular chimney sweep services is important to ensure your fireplace and chimney are working safely.

A level one inspection is the simplest, examining “readily accessible portions of the exterior, interior and accessible portions of the chimney structure and flue, as well as the basic appliance connections.” A level 1 inspection may also include running a video scan of the entire chimney for an in-depth look at hard-to-reach areas.

If a fireplace is changing, such as adding an insert, changing fuel sources, or having the chimney relined, a level 2 inspection should be performed to assess the current condition of the chimney. Similarly, a level 2 inspection should be done if the chimney has experienced damage due to a fire or earthquake.

It is also important to have a level 2 inspection if you are considering purchasing a property with an existing fireplace and chimney. While home inspectors often inspect ducts, they do not go as in-depth as a CSIA-certified chimney sweep and are unlikely to catch anything that isn’t immediately obvious.

A level 3 inspection is the most comprehensive, assessing all aspects of the chimney’s condition and including examination of concealed areas that require removing or destroying components of the chimney building or its finish. This level of inspection is usually only needed when a serious hazard is suspected. Level 3 inspections typically involve extensive demolition work and should only be performed with the permission of the homeowner or the building owner.

When the chimney sweep is on-site, they’ll set up a work area around your fireplace. It may include putting down a tarp and moving items, such as furniture that the chimney brush or soot could knock over. It’s important to clear the area, as the sweep will spend a lot of time at and near your fireplace. They will also work inside the firebox, so removing logs, fireplace tools, and anything else there is a good idea.

The chimney sweep will use a special brush with long bristles to clean your flue and the chimney’s walls. It is a messy job, and the sweeper usually puts down drop cloths in their work area to prevent the creosote and ash from getting into their living rooms. Many sweeps lower video cameras and lights into chimneys to closely examine walls and the liner surface.

If they spot any cracks, gaps, or code violations during the internal inspection, they’ll report them to you. Those also qualified to perform repairs will usually make those recommendations at the same appointment, as it’s best to get them taken care of immediately.

Keeping your chimney free of creosote buildup is impossible without professional help. If you’re a do-it-yourself person, tackling the task yourself can be difficult. Before you start, you need to know how high your flue is. You’ll also need a bright flashlight, fireplace poker, and personal protective equipment for your eyes, face, and hands. Creosote is easiest to remove in its early stages, where it has a matte black finish and isn’t too deep. If you see a shiny, tar-like appearance, it’s a sign of heavy creosote, and you need to call the sweep immediately.

Flooring
Home Improvement

How to Choose the Right Flooring for Your Home

Flooring Fairfield NJ is important to a room’s aesthetic and function. A flooring purchase can be a big investment, so it’s worth investing some time and research into this feature of your home.Flooring

Some spaces need a floor that is resilient to above-average wear and tear, such as an industrial plant or school cafeteria. Other spaces are focused on beauty and design, such as a hotel lobby or retail space.

When looking for a flooring material that will meet your home’s and lifestyle’s requirements, you need to consider many factors, including cost, longevity, comfort, and sustainability. All materials come with their own pros and cons, but homeowners often focus mainly on look and price when making the purchase.

This is a mistake, especially if you want to be eco-friendly and sustainable. While hardwood floors are a great option, there are many other flooring materials that are just as beautiful and have better environmental credentials.

For example, concrete floor types such as poured resin or concrete slabs offer a versatile design-led solution that can be finished to suit any interior. Whether you choose a matt or gloss finish and with or without texture, the only limit is your imagination. It can be poured wall-to-wall or in a specific area of the room, and it is extremely hard wearing, hypoallergenic, sound absorbing and water resistant. It also works well with underfloor heating and is very easy to clean.

Another great option is engineered wood, which combines plywood with a thin layer of real wood for a similar appearance to hardwood but at a much lower cost. It is less susceptible to the damage risks of traditional hardwood and can be stained in a range of colors and finishes. Laminate is also a good choice, as it offers the stylish look of hardwood but at a fraction of the cost. It comes in a wide variety of designs and colors, from realistic wood to tile and stone, and is easy to install yourself with minimal tools.

Cork flooring is also a popular choice, offering a natural and renewable alternative to hardwood floors. It is soft underfoot and has a unique ability to insulate and absorb sound, but it is prone to dents from heavy furniture and has a low tolerance to humidity so requires a lining underneath. Vinyl floors, while available in a wide range of colours and patterns, are not as durable as wood or other flooring materials and can release high levels of volatile organic compounds (VOCs).

Bamboo is another hardwood alternative, with the ability to be colored to show off its unique grain. It is an environmentally friendly and fast-growing product, but is often not as durable or as long-lasting as hardwood.

Don’t Be Afraid to Negotiate

The decision of what flooring to buy often comes down to price, but a homeowner should think about how they will live with the material long term. For example, a flooring material that has a soft feel underfoot can be much more comfortable than one that is rock hard. This is particularly important in rooms that require a lot of standing, like kitchens and laundry rooms.

When shopping for a new floor, it is also important to know the going rate in your area. Get quotes from several local companies to see what the competition is offering. This will give you bargaining power when making your final purchase.

If you’re looking to save even more money on your new floors, consider purchasing them at wholesale distribution. This can cut the cost of the flooring by up to 40%, and it will also mean you have more product on hand should any unforeseen damage occur during installation.

Many homeowners don’t realize that negotiating is an integral part of the process. When shopping for flooring, don’t be afraid to ask for a discount or better terms from the company you are working with. However, it is always wise to remain professional and never let fear drive you into a rushed agreement that may not be in your best interests.

Buy a Sample

Flooring is a major investment and it’s important to purchase a sample before making a final decision. Many stores will offer free samples and they are a great way to get a feel for the floor and to see how it will look with your paint colors and home decor. Some online retailers will even ship the samples to your home free of charge.

Samples of flooring are also a great way to test out the durability of a new product. For example, some wood floors are smooth and will feel nice in socks, while others have a more rugged finish that may seem rougher on bare feet. Similarly, laminate floors can vary in durability – some have a high scratch resistance while others are more vulnerable to denting and staining. Purchasing a sample is the best way to determine which type of floor will best suit your lifestyle.

It’s also worth considering how lighting will affect your flooring choice. The light in a showroom is different from the lighting in your home, and this can dramatically change how a product looks. It’s a good idea to try your flooring in your space with various types of lighting at different times of the day to get an accurate idea of how it will look.

Buying flooring from an established and reputable local business can also be a wise choice because the sales staff will be committed to helping you find the right product for your home. They’ll also be far more likely to work with you on any issues that may arise when compared to some online retailers that don’t really care about their customers.

Getting a flooring sample is the only true way to make sure that you are happy with the color and style of your new floor. If you can’t make it to the store in person then consider asking the manufacturer if they have any of that specific style of flooring available. They might have it in stock at their warehouse or they could be able to give you a similar product under another name or number.

Check Out Reuse Centers

Flooring isn’t typically recycled, so when homeowners need to replace it, the only option is to buy something new. But if a homeowner is willing to take the extra step, they can keep the old flooring out of the landfill and prevent the manufacturing of new materials from scratch.

One option is to find a reuse center or architectural salvage store. These stores specialize in reusing and selling building materials that would otherwise be headed to the dump, including appliances, cabinets, doors, windows, wood flooring and trim, and carpet remnants. These stores also offer educational opportunities for homeowners who want to try a do-it-yourself project.

Reuse centers usually have a limited selection, and the type of flooring they carry changes frequently as they receive new donations. For example, they may only have hardwood planks that are unattached or nailed down. They may not have vinyl or linoleum, which are often glued to the subfloor and cannot be removed easily without damaging them.

In some cases, wood flooring can be reclaimed and used again in another home, especially if it’s a species that grows quickly and can be harvested again. However, the flooring may need to be sanded down and refinished to remove any signs of wear and tear. The boards can then be reinstalled.

Engineered wood floors are another option that may be available for reuse. Unlike solid hardwood, which is typically attached with glue or nails, engineered wood is built with thin layers of natural wood over less expensive plywood. The layers are bonded together with chemical-free adhesives. The resulting product is sturdy, and it can be sanded down and refurbished as needed.

Most salvage shops and reuse centers ask that donated lumber be clean, with no exposed screws or nails that could be a hazard to other homeowners. Many also prefer a more uniform color of the wood, so they can resell it for use in other projects. For example, a person who wants to build a deck may be interested in salvaged wood that’s been exposed to sunlight, but someone who’s planning on using the material to line a bench might need more consistent coloring.

angle masonry
Construction Services

Angle Masonry Anchors

Angle Masonry Anchors

Most masonry anchors are designed to be welded to columns or beams that run straight up and down. Occasionally, we get requests for Pro Angle Masonry Charleston to be set at an angle. It works, but it does have some consequences.tLintels and shelf angles must be sized by an engineer to meet the strength requirements of the steel design codes and to be stiff enough to minimize masonry cracks. It can only be done by carefully reviewing shop drawings at the submittal stage.

angle masonry

Steel lintel angles, also known as angle irons, support the weight of exterior brick veneer over openings in masonry walls like doors and windows. They can be made from various metals but are usually primed and painted to resist corrosion and follow building codes for load-bearing materials. They’re designed to meet the lintel design loads specified by the designer and a minimum of deflection and allowable bending stresses.

When used in a concrete and masonry structural system, they are secured by anchor bolts to the concrete or masonry. Properly designing and detailing shelf angles to support a brick veneer requires careful consideration. It’s important to select an angle with a plate “blade” that allows insulation to pass behind it, reducing the thermal bridge and improving the U value of the wall assembly.

Short masonry lintels supported by wide flange steel angles are easier to install and require less structural engineering than prefabricated lintels. However, they still need to be sized to resist lateral forces. These are typically a result of the wind loading the wall and can be mitigated by using a higher strength angle or providing means and methods for bracing the lintel.

The most commonly used lintel is the single-angle lintel, which can be produced in lengths of up to 20 feet. Depending on the project specifications, it’s available in various thicknesses and is constructed from carbon or high-strength, low-alloy steel. It’s installed with a minimum end bearing and bedded in mortar. It’s also installed with a minimum of 2 inches of clearance from the underlying structure and should have at least two-thirds of the veneer with thickness bearing on it.

It’s important to limit the use of steel lintels where possible. They produce a great deal of embodied energy during production and generate emissions in their transportation to the job site. It is one area where focusing on prefabricated and recycled materials can help reduce upfront costs operating (i.e., energy) costs and the overall embodied energy of a new building.

Steel shelf angles are used to support masonry walls; like lintels, they must be designed and detailed properly. They must also be properly sized and secured to the concrete or masonry structural system with anchors. The key difference is that while lintels resist shear, shelf angles are primarily sized to withstand bending.

As a result, it is important to recognize significant pitfalls associated with using shelf angles in masonry veneer wall construction. These pitfalls include spalling, cracking, and staining of the masonry veneer; shear failure of anchors or slab edges; yielding and slipping of shelf angles; corrosion of the steel angle due to improper design and construction; and leakage of wind-driven rain through the masonry wall and into the structure.

The most significant implication of using shelf angles in constructing a masonry veneer wall is that they create linear thermal bridges in the building envelope. These energy implications are huge, especially in meeting the high-performance requirements of NYC’s residential green standards and the state’s energy code.

Another issue is the upfront material costs and embodied energy associated with producing and transporting steel angle. Limiting the use of these components will help reduce these upfront and operating costs and offset the significant carbon emissions related to their production.

Lastly, the standard design detail of introducing relieving angles into a brick-framed wall breaks the continuity of the exterior insulation. It interrupts the insulation on each floor at every window lintel and creates a significant thermal bridge that impacts the overall R-value of the wall assembly. The designers and project managers must ensure the relieving angles are correctly sized to prevent excessive deflection and rotation. They should be anchored to the masonry or concrete with an appropriate diameter anchor bolt and properly spaced to avoid shear or buckling. They should also be adequately shimmed to allow for expansion and contraction of the masonry wythes above them. Masonry above the shelf angles should be lipped with a gap or air space to qualify for this expansion, and mortar instead of sealant should be used at the lipped joints (sealant will tend to crack and fall off in the face of brick expansion).

Relieving angles (shelf angles) support brick veneer and masonry ties on multi-story buildings. They must be installed along the wall height at certain intervals to keep the masonry from falling off the building. In addition, they are used to create a gap between the walls that allow for movement due to building expansion or contraction. These specialized structural steel components are often required by code with wood and concrete stud walls but can be used with brick or steel framing. In some cases, they are necessary to provide lateral stability to the structure and prevent water infiltration.

When properly detailed, these steel elements can provide structural integrity to a masonry cavity wall system and reduce the risk of cracking due to differential movement between the inner and outer leaf of the wall construction. However, when improperly installed, they can contribute to various issues on a project.

These problems are common in high-rise buildings, where the different elevations can experience substantial movement at the brick veneer, backup walls, and structural elements. This movement can cause the steel relief angle to separate from the masonry walls, significantly damaging the cladding system and causing moisture intrusion in the building envelope.

The most common cause of this issue is improper detailing. The project’s architectural drawings typically show the shelf angles angles’ placement. Still, they must specify a gap beneath the metal required to accommodate building movement. If the crack is not provided, the bricks that are being installed can exert pressure against the relief angle, causing it to separate from the brick masonry.

Another common issue is installing a thru-wall flashing at each relief angle. This detail is critical for proper drainage and prevents water infiltration from the cavity wall to the exterior façade. Fortunately, many of these deficiencies can be controlled with appropriate submittal review during the bid phase and by insisting on including mockups for critical transition details.

Metal brackets are hardware to hold up walls and beams, mount shelves, support pipes, and tubing, brace structures, and keep wires and cables secure. They are available in various sizes, shapes, and styles to accommodate different structural designs. Many other materials can be used to make metal brackets, including aluminum, brass, bronze, and steel. Depending on the application, different metals can offer unique qualities to help the structure withstand loads and conditions.

Several methods can be used to create metal brackets, such as casting, extrusion, and machining. Casting involves pouring molten metal into a mold, which can produce complex and intricate shapes that may not be possible using other manufacturing methods. Extrusion consists of forcing a piece of metal called a billet through a die to form the body. This method can make metal brackets in various shapes, lengths, and thicknesses.

Most metal brackets are made from sheet metal, which can be formed into various shapes and sizes using a machine called a brake. Bending is another common process used to create metal brackets. It is a technique that allows manufacturers to produce L-shaped brackets, for example, and it can be used to create angles up to 120 degrees. Manufacturers can also use a machine to weld brackets together or create threaded holes for fasteners.

Standard masonry support bracket systems can be adapted to suit special masonry details, including the support of soffit brickwork and atypical coursing positions. Designs can also be supplied curved on plan to accommodate radiused masonry.

Stainless steel packing shims can be used between the system and the frame to compensate for structural variations. Alternatively, a serrated slot in the bracket can be fixed to the edge of the concrete slab to give vertical adjustment. Lateral adjustment is achieved by using a combination of shims and slots. This type of system can be supplied from stock or fabricated on-site to suit the requirements of specific buildings.

deck cleaning
Deck Services

How To Properly Clean Your Deck

Keep your deck in tip-top condition by cleaning it regularly. Follow the directions on the cleaning product to mix it and prepare it for use.

Some cleaners require scrubbing, others are premixed formulas that you can spray onto the deck and wash away with the garden hose. Some products are available in value packs for added savings. If you need assistance, call the experts at Pro Deck Builders Charleston.   

deck cleaningUse OxyClean

Oxygen bleach solutions are safe to use and effective for removing mildew, mold, and algae. They are also a good choice for preparing wood decks for staining. Unlike chlorine bleach cleaners, which can damage wood, these eco-friendly products rely on hydrogen peroxide and sodium carbonate to release oxygen atoms that penetrate deep into the wood pores, eliminating stains and leaving the deck clean.

Before using any cleaning solution, sweep the deck to remove loose debris and dirt. Protect surrounding plants and shrubs with a plastic drop cloth. Hose down the deck surface to dilute any cleaner overspray and allow it to dry completely before you begin.

Then, mix the deck cleaner according to the manufacturer’s instructions and apply it liberally to any areas with a heavy concentration of mildew or mold. If you spot a particularly stubborn area of mildew, pour some of the cleaners into a spray bottle and saturate the area. This will make it easier to scrub away the dark stains with your brush or deck brush.

Let the cleaner sit for the amount of time specified by the manufacturer (usually 10 to 20 minutes). Rinse thoroughly with a hose, working to dilute any remaining cleaner in the wood fibers. If a deck is covered with moss or other organic growth, use a hard bristled push broom to gently scrape the surface, being careful not to damage the wood.

For best results, use an oxygen bleach deck cleaner that is formulated for your deck material. Also, keep in mind that although it’s easy to get your deck looking great with white vinegar, this method is not a long-term solution for keeping it looking great. If you want a long-term way to keep your deck looking great, consider hiring a professional to handle this chore for you. They’ll use the best environmentally friendly cleaners formulated for your deck and will leave it clean and refreshed.

Vinegar

Vinegar is a great all-purpose cleaner. It can be used to clean most surfaces and is especially effective on mildew, mold, and grime. It’s also a natural solution that doesn’t contain the toxic chemicals found in many commercial products. It’s safe for wood and composite decking, but it is best diluted before applying.

Start by sweeping the deck to get rid of any large debris, and then hosing it down. This will help to loosen up any caked-on dirt and will make it easier for you to scrub. Once the deck is clean, mix your homemade cleaner and apply it with a brush or broom. Be sure to do a test patch in an inconspicuous area first, as some vinegar may discolor your deck.

For a timber deck, mix 29 ml of ammonia-free liquid dish soap, 3.8 liters of water, 473 ml of rubbing alcohol, and 1.1 liters of oxygen bleach (not chlorine bleach). Scrub the deck with this mixture, rinse it well, and then hose it down. For a composite deck, you can use the same mixture but with one tablespoon of baking soda added.

This is a great way to remove any remaining mildew, mold, or grease stains from your deck, but it’s not ideal for composites, so you should always rinse thoroughly afterward. If you still can’t get rid of all the stains, you can try adding some laundry detergent to the solution.

As you’re cleaning your deck, remember to wear rubber gloves and goggles to protect yourself from any harsh chemicals or bacteria that might be present on the surface of the decking boards. You should also consider using a long-handled scrub brush to avoid having to bend or kneel on the ground.

Baking Soda

After a long, snowy winter and rainy spring, your outdoor deck needs a thorough cleaning to get it ready for guests and summer fun. Many homeowners use chemical-based deck cleaners, but these can be harmful to the environment and damaging to your wood or composite deck surface. If you prefer to clean your deck naturally, try one of these homemade cleaners.

Baking soda, also known as bicarbonate of soda, is an inexpensive and effective household cleaning product that works wonders on a variety of surfaces. It can help to remove mildew stains from your deck and is safe for use on most types of materials. It is best to apply this solution before the stains become too prominent.

Sprinkle the baking soda evenly across your deck, especially on any areas with mildew stains. Allow the solution to sit for about 20 minutes and then scrub the area using a soft brush or broom. Once the stains have been removed, you can rinse the deck with a hose or pressure washer on a low setting.

If you want to keep your deck looking good all year round, sweep it regularly throughout the year to prevent leaves, twigs, and other organic material from accumulating on the surface. It is also a good idea to wash your deck with one of the above recipes at least once each year to remove dirt, dust, and mildew stains.

Several online guides call for either baking soda or bicarbonate of soda in their cleaning recipes. Both are the same thing, but recipes originating in America will often call for baking soda, while those from the UK will often refer to bicarbonate of soda as being a more accurate term.

Borax

Unlike chlorine bleach, borax doesn’t generate harmful gases. It’s also nontoxic and safe to use around plants. It’s a great choice for wood decks since it has degreasing and mildew-fighting properties, says Simple Green. However, because it’s bleach-based, you should wear eyewear, gloves, and a mask to avoid getting it in your eyes, nose, mouth, or throat. It’s also a good idea to sweep and spray your deck with a garden hose before applying this cleaner, and it may be best to cover nearby plants with tarps.

Borax boosts cleaning power by removing hard water stains. Hard water contains mineral deposits, including calcium and magnesium, that prevent soap or detergent from dissolving. Borax binds with these toxins to remove them, and it also helps soften water. To use borax as a deck cleaner, dilute a half-cup in 12 ounces of warm water. Stir until no clumps remain, then pour the solution into a clean spray bottle for use.

Add a cup of powdered borax to the oxygen bleach for extra cleaning strength. This solution is especially helpful if your deck has noticeable mildew stains. It can be sprayed on the stain and allowed to sit for about 15 minutes, then scrubbed and rinsed with your garden hose.

To use TSP as a deck cleaner, mix 1 cup of trisodium phosphate with 1 cup of oxygen bleach and 2 gallons of warm water. After scrubbing the deck, soak it for about 15 minutes before rinsing. The mixture is powerful enough to clean concrete, but it’s safe for a treated deck. It’s best to use this cleaner when you don’t need to wash your deck with a power washer, as intense water pressure can damage the surface and cause it to flake or peel.

Laundry Detergent

It’s not uncommon to use laundry detergent in combination with vinegar or other cleaners for cleaning decks. Laundry detergent is an effective degreaser that works well on mildew and dirt build-up but won’t harm or stain wood. It can also restore some of the color to weathered, graying wood. It may not work as well as bleach on deep-seated mold or algae growth, but it does help prevent mildew spores from taking hold. You can find powdered oxygen laundry cleaner at your local store or online, look for one that is free of fragrance and has simple ingredients.

Aside from removing any furniture or debris, the first step in cleaning a deck is to clear the area of dirt and grime. You can do this by sweeping the deck thoroughly and then using a brush with a stiff handle to get into corners and between railings. For a deeper clean, you can use a power washer. Before doing so, make sure that the nozzle on the power washer is set to “low pressure,” which will avoid damaging the surface of the deck or the wood.

If you decide to use a power washer, follow the manufacturer’s instructions for operating it. Be sure to keep the nozzle no closer than six inches from the deck’s surface, and spray in wide sweeping motions. After washing, rinse the deck with a garden hose. It’s important to allow the deck to dry completely before you put anything back on it, especially if you are planning to apply a protective coating. Consumer Reports recommends that you choose a solid or semi-transparent wood stain to protect the deck from moisture and UV light damage.

deck builders
Deck Services

What To Expect From A Deck Builder

Decks require regular maintenance to avoid rot, mold, splintering, and insect damage. In addition, they may need to be stained or painted every 2-4 years to keep them looking good.

A custom deck builder will create a design that blends naturally into your home. J&R Construction will also make sure that your new deck meets all local building codes and is safe for people to stand on.

deck buildersBetter Quality Decks

Decks are a great addition to any home. They provide a space for outdoor recreation and can increase your property value. A quality deck is also a comfortable and inviting place to relax, cook, or stargaze after sunset. If you’re considering purchasing a new deck, it is important to consider the types of materials available. There are many different options, and each has its advantages and disadvantages.

The most popular type of deck lumber is pressure-treated pine, which has been treated with chemicals to make it resistant to moisture damage, fungal decay, and insect infestation. It is inexpensive and easy to work with, although it must be resealed regularly. However, this material is prone to twisting and warping. It can also release dangerous vapors if it is burned or cut, so it’s essential to wear a mask when working with it.

Another option is cedar or redwood, which are naturally resistant to moisture and fungal growth. These woods are harder and more expensive than pine, but they can last up to 25 years when properly maintained. They are easier to work with than pressure-treated pine, but they may need to be resealed more often.

Finally, there is composite decking, which combines wood particles with plastics to create a long-lasting material. This material is a good choice for homeowners with limited time and budget. It’s environmentally friendly and durable, but it can be expensive if you need a large deck. It is also prone to warping and cracking. If you’re on a tight budget, you can still buy a high-quality skateboard by buying a blank deck from a local skate shop or online. This way, you can support your local scene and meet other skaters in the area.

Faster Process

Decks are a great addition to any home, providing a comfortable outdoor space for relaxation and entertainment. However, constructing one can be a lengthy process. Fortunately, some strategies can help speed up the process without compromising the quality of the build.

For starters, hiring a professional contractor will allow you to have your deck finished in a much shorter time than if you were to tackle the project yourself. This is because they will have the proper tools and knowledge to work faster than you would on your own. In addition, they will be familiar with any local building codes and regulations that you may need to follow when constructing your deck.

Another thing that can help you save time is using high-quality tools, as these will be more efficient than cheap ones. For example, investing in an impact driver will make it quicker and easier to drive screws into wood, as compared to a standard drill. In addition, a circular saw will be much faster than handsaws for cutting boards to the desired length and width.

Finally, you should always pre-drill holes for screws. This will prevent them from splitting and will make it easier to drive them in. This can save you a significant amount of time, especially when working with hardwoods like Ipe or Tigerwood, which tend to split easily.

Large decks can take several weeks or even months to complete, depending on the size and complexity of the design. In addition, the construction process can be delayed by weather conditions and waiting for permits. Therefore, it is important to set realistic expectations when estimating the timeline for your deck build.

Affordable Services

Deck builders can offer a wide range of affordable services. This includes deck repair, maintenance, and cleaning. They are also able to help you make the most of your existing space by adding new elements or features, such as railings. Their services are also affordable and easy to pay for. They can work with your budget and provide you with the outdoor living space that you have always wanted.

In addition to offering affordable services, deck builders can provide you with the best quality and most affordable natural and composite materials. They can also help you design and build a custom deck that will add value to your home. Their goal is to give you a beautiful, functional deck that you can enjoy for years to come.

Their team is dedicated to providing superior service and customer satisfaction. They strive to exceed your expectations on every project. They take the time to listen to their customers and understand what they want from their decks. They also understand that the details are what makes a great deck stand out from the rest and they work hard to make sure that their designs match the vision of their customers.

They were very responsive, worked quickly and efficiently, and were on time with the job. They also did a good job of cleaning up after the job was completed. We would use them again and recommend them to others.

Design Options Available

When working with deck builders, it’s important to ask about the design options available. Many companies have various color choices, railing styles, and more that can give your deck a unique look. In addition, some companies offer different deck materials to suit your needs. For example, some offer natural wood, composites, and even plastic lumber. Each material has its benefits, durability, and style options.

There is an online tool that allows you to design a custom deck. This tool is free, easy to use, and offers a wide range of features. In addition to being able to choose the dimensions and layout of your deck, you can also select from several railings and lighting options.

You can also view a 3D rendering of your deck. This enables clear communication between you and your contractor, eliminates misunderstandings, and promotes flexibility in the design process. This can reduce construction delays and ensure that your deck is constructed to your specifications.

Once you’ve completed your deck design, it’s a good idea to speak with a licensed, professional deck builder about the project. They can review your blueprints and provide advice regarding safety codes and permitting requirements for your area. It’s also a good idea to work with a deck builder who has years of experience in the industry, as this will help ensure a high-quality final product.

Getting a new deck is an exciting project that can improve your quality of life and add value to your home. A skilled deck builder can create a beautiful outdoor space that perfectly aligns with your vision and complements the architectural style of your home. By using a deck builder that offers 3D renderings, you can ensure a smooth construction process and a result that matches your expectations.

Warranty And Protection Options

When you work with a professional deck builder, they typically offer warranties and protection options that last for a specific period. This means that if your new deck experiences any problems after construction, they will usually come and fix them for free within a set timeframe. This is an excellent way to ensure that your new deck will stand the test of time.

When a local deck builder is working on your project, they can often get bulk deals on building materials. This will save you a significant amount of money on the total cost of your deck. They can also help you select the best building materials for your specific needs. This will help you avoid costly mistakes that can happen if you try to do it yourself.

Local deck builders are also well-versed in the local building codes and regulations, ensuring that your new deck will be constructed safely and correctly. They will adhere to all of the standards required to keep you and your family safe, including structural integrity and other guidelines to protect against safety hazards.

Professional deck builders have a creative eye for design and can give you plenty of different ideas for the look of your new deck. They will sit down with you and discuss the various options that would work with your home and yard, helping you find a concept that suits your aesthetic preferences.

When you are doing your deck construction, you may be forced to space out the process over a few weekends. However, this can be very stressful and leave you with a yard that is messy and unsafe. When you work with a local deck builder, they can complete the entire process in a much shorter time frame, allowing you to use your new deck sooner.

Sewer Repair
Plumbing

How to Prevent Sewer Repair

Most homeowners cringe at the thought of replacing their sewer pipes. They imagine large ditches, heavy machinery, and destroyed landscapes.Sewer Repair

But the good news is that trenchless technology has changed sewer repair. This method offers a faster, cleaner, and more affordable solution to traditional pipe replacement. The first step is determining the extent of damage to your sewer line. For professional assistance, contact Plumber Woodland Hills now!

Tree roots are an integral part of a tree’s health, providing uptake of water and nutrients while also anchoring the trees. However, root growth can be a huge problem for homeowners when they invade the sewer line. Attracted to a sewer line’s water and nutrient source, they will grow into and around the pipe until it eventually clogs or breaks. While a broken or clogged sewer pipe is certainly a serious issue, it’s also important to remember that there are preventative measures you can take to help prevent these issues from occurring.

Typically, the first sign of trouble is a slow draining shower or sink. If these issues persist, a professional can use a plumber’s snake to clear the blockage and determine whether or not roots are the cause of the issue.

Invasive roots are not just a nuisance; they can be extremely dangerous. A weakened or damaged sewer pipe can break apart, causing the release of raw sewage into your home and yard. The damage caused by this can be quite extensive, and may even require a complete replacement of your sewer lines.

When it comes to preventing invasive tree roots from damaging your sewer line, the best thing you can do is keep the trees on your property well-groomed and away from the area where the sewer lines are located. It’s also a good idea to have your pipes inspected regularly with a camera to identify any potential problems before they become an emergency situation.

Most modern plumbing and sewer systems are made with PVC or other types of plastic pipes that are tightly sealed. As a result, they aren’t as susceptible to tree root invasions as older clay pipes. However, even these newer pipes can be subject to damage from tree roots if they have a crack or leak in the line. Taking the time to schedule a routine plumbing checkup and replace your older pipes can save you thousands of dollars in potential repairs down the road.

Corrosion

The metal pipes that make up the sewer system are sturdy and durable, but they’re not indestructible. Like all metal, they corrode over time when they interact with chemicals and natural elements. This corrosion can lead to breaks and other problems with the line. Some signs that a pipe is corroded include low water pressure, high water bills and cloudy or discolored water. A plumber can test your plumbing for corrosion and determine if a repair or replacement is necessary.

While corrosion is inevitable over time, it’s possible to prevent some of the issues that come with aging and wear-and-tear by taking proactive measures. Using a water softener and/or a water filter can help reduce the amount of harsh minerals that travel through your pipes. These minerals can cause clogs and speed up the wear-and-tear process.

A damaged or broken sewer line can lead to sewage spilling out of your home and into your yard, which isn’t just disgusting but is also a health hazard. The toxic waste can contaminate the surrounding soil and water, and it can even get into your drinking water.

Many older pipes are susceptible to corrosion because they were made of steel, iron or unlined concrete. Replacing these pipes with corrosive-resistant materials can help avoid future problems and keep your family safe.

Corrosion can also happen inside your house if the piping is in need of repair or replacement. This can be seen by a clogged drain or toilet that is slow to drain, as well as gurgling noises coming from your bathtub or shower. In these cases, a professional plumber should inspect the plumbing and sewer lines to identify the cause of the issue.

A sewer camera inspection can be used to locate the source of the problem, and a trenchless method such as micro-tunneling or pipe bursting can be used to replace the damaged line without digging up your entire backyard. These methods can be much quicker and more affordable than traditional sewer repairs. If you’re looking for a company that offers comprehensive sewer services, contact us today!

Sewage Smells

Sewage smells can be a sign of problems in your sewer line, and they are certainly not something you want to deal with on a daily basis. A few DIY drain odor eliminators such as baking soda, vinegar, and hot water can help to keep the odors at bay for the time being. However, if your efforts are not successful in eliminating the smells, it is most likely time to call a professional plumber for help.

The most common cause of sewage smells is when the drain trap’s water barrier has dried out. All of the drains in your home should have a water barrier to keep sewage gases from entering the house. This includes both the p-traps found under your sinks and the clean-out plugs at each end of your home’s sewer lines. If you notice that the drains in your home are not containing water or a barrier, it is time to check the clean-out plugs, the p-traps, or the vent system for problems.

If you notice that a particular smell is coming from more than one drain in your home, it could indicate a larger problem in the sewer line itself. This could be a result of broken pipes, clogs, or structural abnormalities in the line itself. If the problem is not addressed quickly, it can lead to more serious issues and a costly sewer line replacement.

Another possible issue that can cause sewage smells is when the oxidizers in the sewage line have been depleted. These oxidizers are added to the sewage to reduce the amount of hydrogen sulfide in it, which can produce foul odors. The oxidizers are typically added in small amounts, which is why they can easily depleted over time.

When the oxidizers in your sewage line are low, it may be time to flush the entire system and add more. This will help to eliminate any odors and also ensure that the oxidizers are distributed evenly throughout the system. A plumber will also be able to determine if this is the best course of action in your situation.

Gurgling Sounds

A gurgling sound in the plumbing is a sign of air or gas trapped in a pipe. This can be caused by a drain clog that is blocking the flow of water or by a vent pipe that has become blocked. The physics are fairly simple: When a clog stops the flow of water, it creates negative pressure in the lower portions of the pipe and a vacuum in the upper sections close to the fixtures. The pressure or vacuum causes a movement of the sewage and air, creating the gurgling sound.

The most common reason for a gurgling sound is a blocked sewer line. This large line takes all the waste from your home’s drains and channels it to the city sewer system. If this clogs, all of your drains will be affected. A clog in the main sewer line is usually beyond your control, and will need to be fixed by your town or the local water company.

Another cause of a gurgling toilet is when the flapper in the tank isn’t working properly. The purpose of the flapper is to open when water flows into the tank and to close when the toilet flushes. If this part doesn’t work, the water won’t flow through the pipe properly and will remain in the tank. This can result in a gurgling noise, as the water in the tank will be moving around without an outlet.

In some cases, a gurgling sound could be coming from the vent stack on your roof. This vertical pipe helps control your plumbing’s air pressure and releases exhaust gas, but it can also get clogged with debris. A clog in the vent stack can affect your plumbing, leading to slow draining and foul sewer smells. It’s best to leave these jobs to professionals, as they have specialized equipment such as cameras that can drop into the vent stack or powerful sewer diggers that can cut right through tree roots and clogged sewer lines.

If you notice a gurgling sound, it is important to act quickly. A clogged sewer line can lead to serious problems, including sewage backups and dangerous health issues for you and your family. A professional plumber will be able to diagnose the issue and give you the best options for repair.

Leak Detection
Plumbing

Pipeline Leak Detection Using Drones and Temperature Sensors

Leak detection is an important aspect of pipeline management. It can prevent damage, save energy and money, and reduce environmental contamination.Leak Detection

Unexplained wet spots around the property, water gushing through pipes, and high water bills are clear signs of leaks but there can be other symptoms too. Like deteriorating building materials, higher levels of moisture in the air, and mold growth. Contact Freedom Plumbing for professional help.

Drones are everywhere, assisting in searches for hurricane victims, providing law enforcement and the military an eye in the sky during terrorist situations, and advancing scientific research in some of the most extreme climates on Earth. They’re also popular toys for hobbyists and a crucial tool for photographers. And now drones are proving to be well-suited for the tricky task of finding leaky oil and gas equipment.

Because they’re small, can be flown at a variety of distances and heights, and are capable of collecting data at high speeds, they make it easier to find the source of a leak than a traditional inspection team or even a helicopter. Plus, they can be deployed at a moment’s notice without organizing and preparing equipment or personnel.

In fact, some of the largest players in the natural gas industry already use drones to detect leaks in their pipelines. The reason? It makes good business sense.

Using drones to pinpoint leaks can also be more accurate than conventional detection systems. Because drones are able to fly closer to the equipment in question, they can isolate and confirm the location of a leak with greater precision than other tools.

The ability to gather real-time data at a much faster rate than a human team also improves efficiency. Plus, the cost of a drone is significantly less than that of a full inspection crew or a helicopter flight.

And there are a number of different drone sensor options available that are ideal for detecting methane leaks. These include ultrasonic, laser or lidar distance sensors, time-of-flight and chemical sensors. Visual sensors are another option, offering standard visual red, green and blue wavelengths, as well as thermal and hyperspectral capabilities. Accelerometers, gyroscopes, magnetometers and barometers are all common features on drones as well.

One research group has developed the first autonomous small drone swarms that can detect methane and other potential chemical threats. The drones work in “chainsaw” patterns to map rooms without the help of GPS and communicate with one another to avoid collisions and collectively scan spaces.

The researchers are working to adapt this technology to locate damaged nuclear reactors and other dangerous facilities. They’re also experimenting with ways to incorporate the drones into disaster response plans.

LiDAR

In a similar fashion to radar, lidar sends pulses of light just outside the visible spectrum at high speeds. These pings bounce off objects and reflect back, recording data about their size, shape, and location. The device then processes this information to create a detailed three-dimensional point cloud. The point cloud can be analyzed to find leaks, obstructions, and other abnormalities. The technology is useful in both land and aerial applications.

A LiDAR system comprises three main components: a laser source, a scanner, and a detector. The laser sends out a series of short bursts of light that travel through the air and are reflected by objects. The scanner — often a revolving mirror or a micro-electromechanical system (MEMS) — captures the returning light and directs it to the detector. The detector measures the time it takes for the light to return from the object and then to the scanner, enabling the system to calculate distances between the sensor and objects.

LiDAR is commonly used in topographical mapping and forestry, as well as for detecting forest fires. It can also be found in autonomous vehicles to enable perception and navigation workflows. In leak detection, the technology is able to scan the environment for anomalies and provide accurate 3D imaging of underground assets, pipelines, and other infrastructure.

In oil and gas, a company called Bridger Photonics uses gas mapping LiDAR to detect and quantify methane emissions. This equipment mounts to aircraft operated by aviation operator American Patrols and can cover large areas from the sky, triangulating methane plumes and their sources. The sensitivity of this system allows field crews to visit only the sites where methane concentrations suggest an issue, saving time and reducing risk.

In addition to a X, Y, and Z position, the data from a LiDAR point cloud can be “classified,” meaning that specific attributes are associated with each of the points. For example, the type of vegetation each reflected off of is recorded. This information can be used to flag locations that should be inspected by hand or requiring further investigation.

Acoustic Leak Detectors

Acoustic leak detection relies on sound waves to locate leaks in pressurized pipes. When water leaks it creates a whooshing noise that can be picked up by specialized detectors that are designed to zero in on this specific sound. Acoustic detectors are often combined with other technology to help pinpoint leak locations.

For example, LiDAR is able to detect a pipe’s location by measuring the time it takes for laser pulses to reflect off objects. It then uses this information to create an image of the surrounding area. When coupled with acoustic data, this allows technicians to find the exact spot where the leak is occurring and quickly fix it.

A leaking toilet, bathtub, or kitchen tap can waste thousands of gallons every year and adds up to high water bills for homeowners. This is why acoustic leak detection methods are crucial to helping prevent these costs from mounting over time. Acoustic detection systems rely on sound to find leaks by listening for the rhythmic pulsation that the water supply system makes as it closes and opens valves. Once a rhythmic pattern is detected, the sensor will send an alert to the technician who can then follow the signal to the source of the leak.

Acoustic sensors can also be integrated into water meters to provide constant monitoring for developing leaks. This helps to save valuable time for technicians who may otherwise have to perform manual surveys on a daily basis. In a pilot trial period, for instance, Echologics found six previously unknown leaks using acoustic sensors integrated into flowIQ 2200 water meters.

It is important to remember that acoustic sensors can only hear sound in the range of 3 or 4 feet deep. This means that while it can be used in many situations, it will not detect leaks beneath the surface or in the groundwater. Sandy soils and loose, soft soils do not transmit sounds very well. In contrast, hard, compacted soils and rocky sites transmit acoustic signals better.

To use an acoustic leak detection system, the microphone of the device should be placed over the suspected leak site. The sound is then measured by the acoustic sensor and transmitted to a screen that displays the results. A correlation screen will then display the strongest acoustic peak, indicating the leak position.

Temperature Sensors

Temperature sensors are vital in a wide variety of industries and applications. They’re all around us and used in our everyday lives, from medical devices to electrical appliances in the home and commercial building HVAC systems. These sensors keep an eye on the temperature of different solids, liquids and gases to ensure they remain at a safe level of use. They’re also critical to maintaining a stable environment for many industrial machinery and manufacturing processes, as well as power plants and other industrial environments.

Different temperature sensors are used to measure different temperatures. For example, RTD sensors are made from pure metals that change their resistance based on temperature in a predictable way. Thermistors, on the other hand, are made from ceramic or polymer materials whose resistance decreases with increasing temperature. RTDs are generally more accurate and are capable of measuring across wider temperature ranges than thermistors.

Thermocouple sensors are a type of temperature sensor that operates by generating voltages based on differences between two dissimilar metals that connect at different points in the sensor. They are used for high-precision and accurate temperature measurement with the ability to work over a wide range of temperatures, ranging from -200°C to over +2000°C. Depending on the temperature range, thermocouple sensors may require calibration to achieve the desired performance.

In addition to preventing damage from water leaks and flooding, smart temperature sensors can help prevent the spread of harmful microbes in a building. They can monitor the temperature of different areas in a building, alerting maintenance staff when they need to take action. They can also shut off the water supply when necessary to stop the spread of mold or mildew, preventing costly repairs and minimizing health risks for building occupants.

While proactive steps like installing sensors and monitoring your home’s water and air conditions can greatly reduce the risk of property damage from unforeseen events, it’s important to make sure you have comprehensive homeowner’s insurance coverage. This type of coverage can cover your repair costs, replace damaged belongings and offer liability protection if someone is injured on your property.

Commercial Remodeling
Construction Services

Benefits of Commercial Remodeling

Commercial remodeling is a great way to update your business without spending a fortune on new construction. However, commercial remodels must be planned carefully and executed with a professional to ensure the success of your project.Commercial Remodeling

Commercial remodeling can cause inconvenience to your employees and customers, but planning ahead will minimize these problems. Visit Website to download this free checklist to help you stay on track throughout your commercial renovation project.

When commercial remodeling is done to meet the specific needs of a business, it boosts productivity and efficiency. This translates to lower operating costs for the business. For instance, an efficient layout means that employees don’t have to spend a lot of time traveling from one office area to another to get what they need. It also means that they don’t have to keep grabbing items out of common areas or borrowing each other’s equipment, which takes up more time. This efficiency results in less downtime and more profits for the company.

Before a commercial remodeling project begins, it’s crucial to set clear objectives and requirements for the renovation work. During this planning phase, property owners collaborate with designers and commercial remodeling contractors to create a plan for the renovation. This will help them decide what kind of design they want to create and how much it will cost.

Property owners must consider the building’s current occupancy and any plans for future use of the space. The number of workers on site will also affect the amount of time the remodeling job will take, as will the availability of power, water, and other resources. The property owner must also consider any additional materials or services they may need.

Commercial remodeling projects are often expensive. However, it’s possible to reduce the overall costs by making smart choices when it comes to materials and labor. By purchasing products and materials in bulk from reputable dealers, property owners can enjoy discounts on their remodeling expenses. Additionally, using high-quality materials will reduce the maintenance and replacement costs down the line.

Commercial remodeling is also an excellent opportunity for businesses to switch to energy-saving electrical models. In fact, many of these models can save businesses thousands of dollars in utility bills per year.

Increases Employee Morale

Workplace morale is an important factor in employee productivity. Poor morale can lead to employees spending too much time at work, sacrificing their personal lives and family obligations, and becoming overwhelmed by stress. Fortunately, commercial remodeling can help boost morale by improving the workplace environment.

Modernize your office with an open layout that promotes collaboration. This can increase communication between team members and allow them to work together on projects more effectively. This can also make it easier for new hires to fit in with the company culture.

By improving the workplace’s aesthetic, you can show your employees that you care about their wellbeing and want them to succeed at work. Full-service remodeling also creates a positive business image that can help attract potential customers.

Besides boosting morale, commercial remodeling is a great way to make your business more efficient. By eliminating outdated equipment and introducing new technology, you can increase productivity and improve the overall performance of your business.

Another benefit of commercial remodeling is that it allows you to adapt your business space to your changing needs. This can include adding meeting rooms, implementing smart office solutions, and adjusting the layout to maximize the available square footage.

Finally, commercial remodeling can help you comply with building codes and regulations. This can be especially useful for older buildings that are not up to date with current safety standards.

Before you begin the commercial renovation process, it’s essential to establish clear goals for the project. This will help keep your project on track and ensure that you stay within budget. Moreover, it will help you find the right contractors for the job. It’s important to choose a contractor that can deliver high-quality results with minimal disruption to your business.

Boosts Productivity

Commercial remodeling can bring in a fresh new look for your business, which makes the place feel newer and improves employee morale. It also boosts customer satisfaction and improves the company’s image. Moreover, it helps reduce energy costs by replacing old equipment with energy-efficient models. It’s important to choose a contractor that has extensive experience in the field of commercial renovation. A well-experienced contractor will give you the best quality work at a reasonable price and ensure a safe project.

In addition to providing a modern and appealing environment, commercial remodels are a great way to comply with regulatory safety standards. For example, the Americans with Disabilities Act requires all public spaces to be accessible to people with disabilities. If you don’t make these modifications, it may be difficult to maintain a certificate of occupancy.

It’s also possible to use commercial remodeling to reflect a brand’s values and culture. For example, businesses can add a display area where they showcase their products and services. This way, they can attract more customers and increase their sales. Furthermore, commercial remodeling can help them save money by avoiding the cost of moving to a new location.

Commercial remodeling can be a daunting task, but it is essential for boosting productivity and attracting more clients. Commercial renovations are a great option for enhancing your brand image, keeping employees happy, and reducing energy costs. Nevertheless, it is crucial to have a detailed plan and hire the right contractor for the job. This will avoid any miscommunications and help you stay on track with your budget. It is also crucial to understand that commercial renovation can be disruptive to customers and employees, so you should take steps to keep them informed.

Attracts New Clients

A remodeled building that meets the needs of today’s business and consumer demands is much more likely to attract new clients than an outdated and unappealing building. Commercial remodeling is an affordable way to increase a building’s resale value, as well as keep it competitive in the marketplace.

Whether a company wants to add a new entranceway or expand their current breakroom, there are plenty of cost-effective improvements that can be made. Remodeling can declutter cramped areas and free up more space for employees to move around, improve morale, and boost productivity.

A remodeling project is a great opportunity to showcase your work and connect with clients. Using social media to highlight your customer reviews and testimonials is a simple, effective way to generate leads and convert potential customers into satisfied clients. Podium’s Reviews tool makes it easy to collect feedback from your happiest customers and share it across your online profiles, making it more likely that future customers will choose your services.

Email marketing is another key lead generation strategy that can help your remodeling company grow. Sending out unique, coordinating emails can build trust and communicate important information about your business. It’s also a great way to keep in touch with your existing client base and invite them to new offers or promotions.

Offering time-limited promotions is another way to encourage your clientele to use your remodeling services. These offers can be anything from a limited-time discount on a service to referral rewards. By putting a deadline on these promotions, you can create a sense of urgency that motivates people to act quickly. For example, a business that’s offering a 20% discount on kitchen renovations could put the offer up for just one day to drive immediate sales.

Energy-Efficient

A commercial remodel is a great way to increase your business’s energy efficiency. By revamping old HVAC systems, replacing light bulbs with ENERGY STAR rated models, and installing new insulation, you can significantly cut down on your building’s energy bills. Commercial remodeling is also a great way to boost your business’s aesthetics. Installing new paint, furniture, and fixtures can give your company a fresh, updated look at a fraction of the cost of a complete rebuild.

Clients and employees will notice the difference between an outdated property and one that has been remodeled. An outdated building can send the message that your company is behind the times and doesn’t care about keeping up with trends. A remodel can also add value to your property if you decide to sell it in the future.

Remodeling is a good option for businesses that want to expand but don’t have the means to build a new facility. A remodel can create more space for employees, equipment, and inventory. It can also improve the flow of your business by making it easier for employees to access supplies and customers to navigate throughout your building.

Depending on your business, you may need to shut down completely during the commercial renovation process. However, your contractor can work before and after hours or during weekends to minimize any inconvenience for your employees and clients. They can also use low VOC paints and run your HVAC system continuously during the finishing process to minimize indoor air pollution. This will keep your staff and patrons safe, happy, and productive while the project is underway. It can even save your business money by avoiding costly fines and penalties from governing bodies.

Roofing
Roofing Services

Roofing Flashings – Signs to Call a Roofing Contractor

The roof is an important part of a home and must protect against the weather. It is important to check it regularly for damage and repair.Roofing

A majority of leaks occur at the flashing, so this should be inspected closely. A roofing professional can re-caulk or replace the flashing to prevent leaking.

Roofing flashings are the metallic guardians that keep water from entering the roof at the seams and penetration points. They’re also prone to wear and tear, so it’s important for homeowners to look for signs of deterioration. If you notice any of the following problems, it may be time to call a professional roofer.

There are a few different types of flashing, but roofers choose the right one for each specific situation. For instance, base flashing consists of two sheets of metal that can move over each other as the roof expands and contracts, and it’s typically used around chimneys and other protrusions. On the other hand, kickout flashing — often called “diverter flashing” — prevents water intrusion into building structural components by directing it to the exterior.

Flashing is made of water-proof materials like copper, lead, galvanized steel, and aluminum. But even these high-quality materials are susceptible to wear and tear if not properly installed. That’s why it’s so important to have your roof flashing inspected regularly by a qualified home inspector.

The first sign of a problem with the flashing is the presence of rust spots or corrosion. These stains can be caused by water or the elements, leading to roof leaks. In some cases, they can even cause wood rot and other structural damage.

Other common flashing problems include gaps, looseness, or discoloration. Nails and screws attach the flashing to the roof and can wiggle loose over time. They should be checked periodically and tightened or replaced as needed. Additionally, flashing is sometimes exposed to sunlight, which can cause it to deteriorate or fade over time.

While it’s possible to repair some minor damage to flashing, most require complete replacement. This can be a messy job, and it’s best left to professionals who know how to properly remove the shingles and replace the flashing without causing further damage. This type of work can also help to identify other roofing problems that may be affecting your home. Contact us today to schedule a free inspection. We’ll help you determine if it’s time to call a professional roofer for repairs.

Inspect the Roof

A roof is one of the most important components of any home or commercial building. It protects the interior from weather and debris, and proper care and maintenance can ensure that it lasts for many years. A roof inspection can identify problems before they develop into serious problems requiring costly repairs.

During a home roof inspection, an inspector will first closely examine the shingles and other materials. They’ll look for signs of wear and tear, such as buckling, fading or sagging. They’ll also examine the shingles for signs of moisture, such as dark spots or moss, or water damage, such as mold and mildew.

Next, the inspector will check the flashing, which are the metal pieces that redirect water and keep it from getting into the structure. They’ll look for any cracks, gaps or rust and check around the chimney, dormers and vent pipes. If the flashing is damaged, water can seep into the house, causing rot in the interior and other issues.

In addition to looking at the shingles themselves, the inspector will examine the gutters and downspouts for any stains or damage. They’ll also check for a good level of attic insulation and ventilation, as this is essential for the longevity of the roof. Without proper ventilation, shingles can become damaged and rot can occur.

Depending on the type of roof, the inspector may have to get on a ladder to inspect some areas. If they use a ladder, the inspector will wear specialized safety equipment to ensure their protection. Once they’re on the roof, they’ll look for signs of sagging, uneven roof planes, or a loss of shingle granules. They’ll also look for any piles of leaves or debris that might retain moisture.

Once the exterior inspection is complete, the inspector will check the attic and interior walls for signs of a leaky roof. They’ll also look for any moisture stains or mold, which are sure signs that the roof’s integrity is compromised. If they notice any issues, they’ll write up a report and recommend any necessary repair work.

Inspect the Felt

Unlike roof tiles or shingles, roofing felt is made almost exclusively for use as a roof underlayment. The inspector will check that the right kind of roofing felt was used and that it was installed properly. There are different kinds of roofing felt, depending on the size of the project and the required fire rating. Using the wrong type of felt can compromise the roof’s structural integrity. It may also be a sign of rushed or inferior workmanship.

Plumber
Plumbing

What Does a Plumber Do?

Plumber Sarasota installs and repairs pipes that carry water and gas to and from fixtures such as bathtubs, sinks, toilets, and dishwashers. They also work on plumbing systems in commercial and industrial buildings.Plumber

Plumbers must have good math and physics skills to understand how these large systems work. They also need strong problem-solving skills to fix issues like clogged drains and broken pipes.

Whether they work in homes, schools, factories or other industrial settings, plumbers install the pipes that deliver water and gas to, and carry waste away from, residential and commercial buildings. They are also responsible for connecting appliances to these systems, such as toilets, sinks, showers and dishwashers.

Plumbers often work in confined spaces such as crawlspaces, basements and attics where they can be exposed to dust, debris and chemicals. They use hand and power tools to cut, measure and shape pipe and to solder joints. They also need to be able to read blueprints to determine the location of fixtures and pipes, as well as comply with building codes and regulations.

In addition to installing piping, plumbers also repair or replace existing plumbing systems. This may involve removing and replacing parts such as faucets, toilets, showers and bathtubs. They also inspect piping for leaks and other problems. In some cases, plumbers are called to diagnose and fix plumbing problems that do not require new piping or major renovations.

On the job, plumbers interact with customers and other tradespeople to discuss plumbing problems, review plans and pricing and schedule work. They also use computer programs to create diagrams of piping and plumbing systems, and they read blueprints and specifications to determine the location and dimensions of piping and fixtures.

Many plumbers are required to perform rough unskilled labor such as digging holes, setting cement and moving heavy materials. They must be able to operate hand and power tools such as wrenches, pliers and hammers. They also need to be able to bend, shape and weld metal to assemble piping and fittings. Plumbers typically need a high school diploma or equivalent and receive on-the-job training under the supervision of a master plumber. Some attend a technical school to learn skills such as blueprint reading and welding in order to advance their career. In addition to being licensed by their state, some plumbers are members of a union that negotiates wages and benefits. Others are self-employed and do not need a license. On average, Americans work into their 60s, so it is important for workers to have a safe and healthy environment.

Repair

Plumbing repairs are often necessary, as pipes can burst or develop cracks. This can lead to water wastage and damage the structure of a home. In this case, plumbers need to identify the source of the problem and make the appropriate repairs. Some common plumbing repair issues include clogged drains, toilets that don’t flush properly, and leaky faucets and pipes.

In some cases, a pipe may need to be completely replaced. This can be a complicated job, as the plumber will need to cut out the old pipe and install the new one. This process requires more advanced plumbing skills, as the plumber will need to solder the joints of the new pipe.

Some pipes are hidden behind walls or in floors, making them difficult to reach. When these pipes need to be repaired or replaced, it is important that the plumber has access to a saw with a long blade. This tool can cut through the wall without damaging the pipe inside. The plumber can also use a wrench to loosen the fitting on the end of the pipe and remove it.

Leaky faucets and pipes are a common issue that needs to be fixed quickly. These leaks can cause water damage, mold growth, and higher utility bills. In most cases, the plumber will simply need to replace the faucet or pipe. However, if the leak is severe, the plumber might need to replace entire sections of pipe.

Other plumbing problems can be much more complex and require the services of a skilled professional. For example, a clogged drain can be caused by a variety of issues, such as too much toilet paper, hair, or food being sent down the drain. A plumber will be able to inspect the drain with a camera and determine the root of the problem. They will then be able to use a drain auger or snake to remove the blockage.

Plumbers also deal with more serious issues, such as sewage backflow. This can be a health hazard, as it contains human waste and other debris. Plumbers will need to wear protective clothing and use special tools to clean the contaminated area and dispose of it correctly.

Maintenance

The plumbing system in homes and businesses takes away waste water, provides freshwater for drinking and washing, and regulates indoor temperature through pipes, vents, fixtures, and appliances. Plumbers install, repair and maintain these systems. Their work may include laying new pipe, replacing old or damaged pipes, or fixing leaks and other problems. They also test their work to make sure it is functioning properly. In addition, some plumbers specialize in repairing specific fixtures like bathtubs, showers, toilets, sinks, and built-in kitchen and bathroom appliances.

Plumbers typically need at least a high school diploma to start their careers. They can then pursue vocational school training or an apprenticeship to learn the trade. Apprenticeships usually last between two and five years and combine classroom instruction with on-the-job training. After completing the program, plumbers must pass an exam to become licensed. The licensing process varies by state, but generally involves passing an exam on the basics of plumbing, building codes, and piping systems.

Plumbing is a skilled trade that requires patience and manual dexterity. Plumbers must be able to interpret blueprints and be comfortable working with tools. They often travel to different job sites and may spend extended periods of time on-call for emergency repairs. Because of the nature of their work, plumbers can expect to work evenings and weekends.

Some plumbers choose to work for large plumbing companies, while others start their own independent companies or service contracts. Many plumbing companies require their employees to undergo extensive on-the-job training before they hire them. This allows the company to ensure that its plumbers are capable of handling a variety of jobs, including complex installations.

In order to be a successful plumber, it is important to have good communication skills. They must be able to listen to customers’ concerns and explain how to fix the problem. Plumbers also need to be able to answer questions about their products and services. They may need to explain complicated plumbing processes, such as how a new fixture works or why certain pipes are needed. This can be challenging for homeowners who may not understand the technical language used by plumbers.

Troubleshooting

While some plumbing problems are easily fixed by homeowners (a dripping faucet here, a clogged drain there), others require the expertise of a professional. When it comes to fixing major issues such as water heater malfunctions, leaking showerheads and faulty toilets, a plumber has the tools and know-how to get the job done quickly and efficiently.

Leaking pipes are a serious problem that can cause significant water damage to a home or business. Plumbers use a variety of techniques to find and repair leaks in pipes, including locating the source of the leak, covering unnecessary holes in pipes, and replacing sections of pipe when necessary.

If you notice water stains in your basement or ceiling, it could be a sign of a leaking sewer line. Sewer lines run underground from your home to the sewer system, and when they’re clogged, it can lead to nasty odors and even flooding. Plumbers who specialize in sewer repairs can diagnose and repair problems with these important lines.

Another common plumbing issue is low water pressure. This can be caused by a number of things, including mineral buildup in pipes, a broken water valve or a leaking water heater. A plumber can fix most of these problems, but if the problem is severe, a new water heater may be needed.

Do you hear mysterious knocking noises coming from your pipes? While it might be a little alarming at first, this is typically a harmless problem caused by loose support straps or excess water pressure. However, if the sound continues to occur, it’s best to call a plumber right away.

One of the most difficult plumbing problems to resolve is a clogged drain or sewer backup. While these issues can be caused by a wide range of factors, from tree roots to heavy storms, plumbers are usually able to resolve the issue by cleaning or replacing damaged sections of pipe. In some cases, this may involve trenching or digging to expose the clogged line and remove it entirely. For more severe clogs, plumbers can also use chemical solutions to break down debris and eliminate the blockage completely.