Construction Management

Industry Roundup: Hilti Acquires Construction Technology Company Fieldwire

The power tool and fastening manufacturer Hilti Group has acquired Fieldwire, a construction technology company, for approximately $300 million.

Fieldwire’s jobsite management software is used on more than a million construction sites worldwide. The company’s products enable general contractors and subcontractors to run efficient field operations on their jobsites, saving on average one hour per day for each individual user. 

Founded in 2013, Fieldwire is known for its device-agnostic, field-first approach to productivity. The software gives contractors and tradespeople access to plan viewing, as-built drawings, task management, scheduling, punch lists, inspections, reports and forms.

SMS Parts joins Open-S Alliance for tiltrotators and quick couplers

SMP Parts, a manufacturer of tiltrotators and quick couplers, has joined the Open-S Alliance as a full member. The Open-S Alliance sets standards for the physical attachment points and hydraulic interface used on tiltrotators and quick couplers for excavators. Companies that participate in this industry-wide standard enable their customers to use their couplers and tiltrotators with any participating OEM regardless of brand.

“Standardization is an important part of improving both the user experience and the enhanced safety of our customers,” says Patrik Lindqvist, CEO and president of SMP Parts.

“By becoming members of the Open-S Alliance we take our responsibility in creating one global standard, whereby the safety of products must never be compromised.”

Open-S offers OEMs memberships in three levels – full member, associate member or supporting member – depending on whether Open-S products are developed, produced in-house or sourced.

Trimble Q3 financial results up 14%

Whatever trouble the economy might be having this year, it hasn’t hurt Trimble. The company’s third-quarter results posted November 3 showed revenue of $901.4 million, up 14% year-over-year for the quarter. Revenue (annualized recurring) was $1.36 billion, up 8 percent year-over-year.

For 2021, Trimble now expects to report GAAP revenue of about $3.6 billion. Compared to last year, net income is up 42 percent. The stock was trading at about $61 a share this time last year and is up to $87 currently. Net profit margin is 13.76 percent, up almost 29 percent from last year.

Since ConExpo-Con/Agg, Trimble has been busy on developing technology for contractors. Here are some of its recent innovations:

Spot the Robot Dog Fetches Your Data and Brings Back As-BuiltsNo Base Station? No Problem. Trimble SPS986 and CenterPoint RTX corrections give you a go-anywhere GPS roverAutomatically Set Screed Slope and Depth With Trimble’s New Roadworks 3D Paving ControlTrimble debuts mast-free motor grader system, new Earthworks platform and more at CONEXPO-CON/AGG

Did you miss our previous article…
https://www.3555pacific.com/?p=705

Construction Management

Massive I-80 Project Prepares to Take Off for Largest U.S. Inland Port

Advance construction on a $1.2 billion interstate project to improve access to North America’s largest inland port is underway.

The rebuild of 16 miles of Interstate 80 in Will County is expected to take six years. The 50-year-old section is part of one of only three coast-to-coast interstates in the U.S. and sees 80,000 vehicles a day, with trucks making up one-fourth of that traffic, according to the Illinois Department of Transportation.

“With demand for freight projected to double in northeastern Illinois the next 20 years, Will County’s role as a transportation hub and the country’s largest inland port is critical,” said Illinois Transportation Secretary Omer Osman.

Advance work on I-80 began in June with a $47 million project to replace several bridges in Joliet, Rockdale and New Lenox and widen a section of the interstate. This project will reconstruct the U.S. 30 interchange, adding a third I-80 lane in each direction west from Interstate 355. Ahead of the Thanksgiving holiday, a third lane on Interstate 80 was opened in both directions in New Lenox as part of this project.

To speed up the I-80 rebuild, IDOT plans for construction, land acquisition and final engineering on sections to occur simultaneously. A section from Ridge Road to the DuPage River will be under construction starting next year, while land acquisition progresses and final engineering is completed on replacing the Des Plaines River bridges, IDOT says. In 2023, work will shift to the section between Ridge Road and U.S. 30. Construction of the Des Plaines River bridges and Center Street and U.S. 52/Illinois 53 (Chicago Street) interchanges will take place in 2026 and 2027. 


The planned construction phases for the $1.2 billion, six-year I-80 rebuild project in Illinois.Illinois DOT

When it wraps up in 2027, the overall I-80 project will have:

Redesigned and rebuilt 16 miles.Added or extended auxiliary lanes to improve safety and reduce congestion.Rebuilt or improved Interchanges at Interstate 55, Illinois 7, Center Street, Chicago Street, Richards Street and Briggs Street.Built a new flyover ramp linking southbound I-55 to westbound I-80 to improve traffic flow and safety. Rehabilitated or replaced more than 30 bridges.Built 8 miles of sound walls to protect nearby neighborhoods from traffic noise.Built bike and pedestrian paths.

“These overdue improvements will not only make it safer for commercial drivers, but for the thousands of families who rely on I-80 to commute to work, drive their kids to school and move safely through their daily lives,” said Governor JB Pritzker. 

The I-80 project is being funded by Rebuild Illinois, the largest capital program in the state’s history. The $33.2 billion program was enacted in 2019, and the state’s gas tax was doubled to pay for it. The program focuses not only on roads and bridges but transit, waterways, freight and passenger rail, aviation, and biking and walking traffic, according to IDOT. 

Did you miss our previous article…
https://www.3555pacific.com/?p=702

Construction Management

A Dozer from Doosan?: Here’s the Sneak Peek (Video)

Known primarily in the U.S. for its excavators and wheel loaders, Doosan is entering new territory in construction equipment with its first ever dozers.

Also unusual for the South Korean company is that the new dozers will make their world market debut in the U.S.

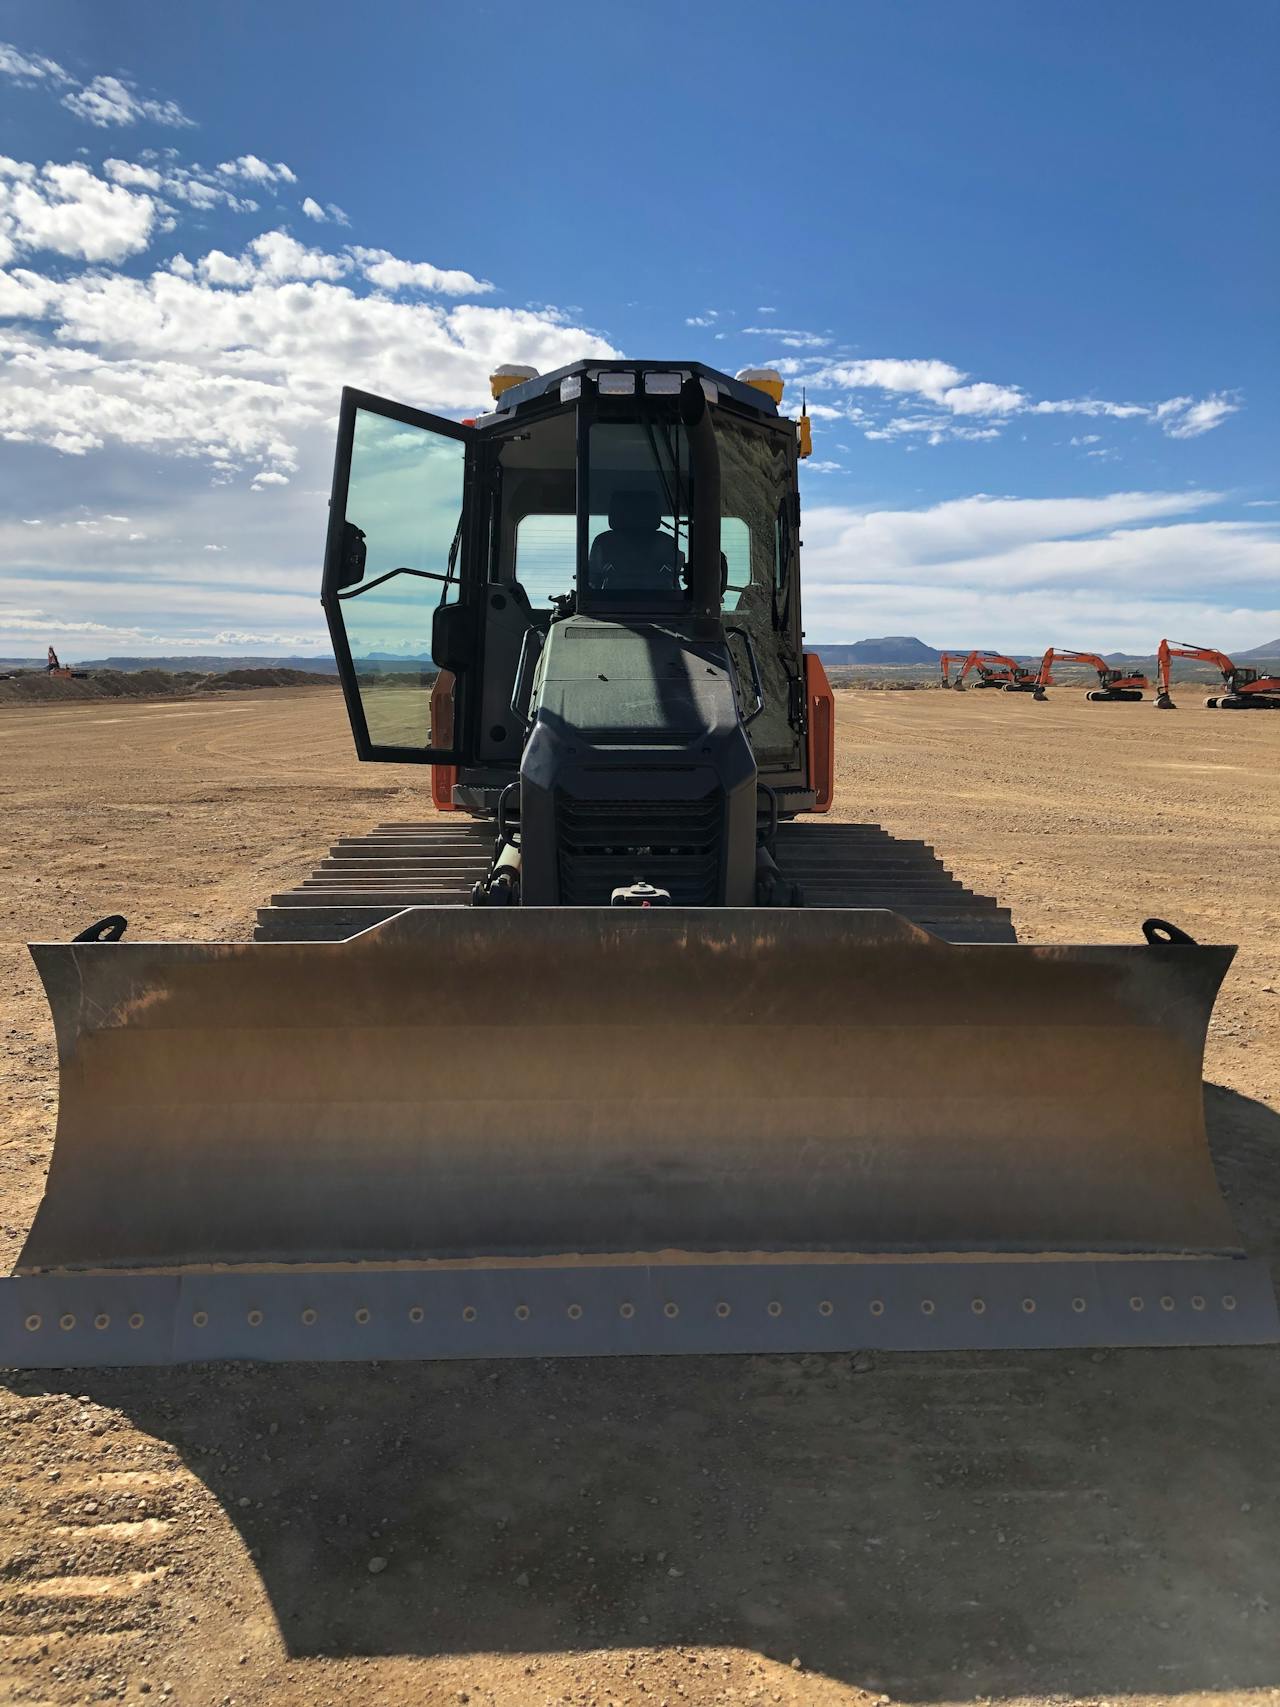
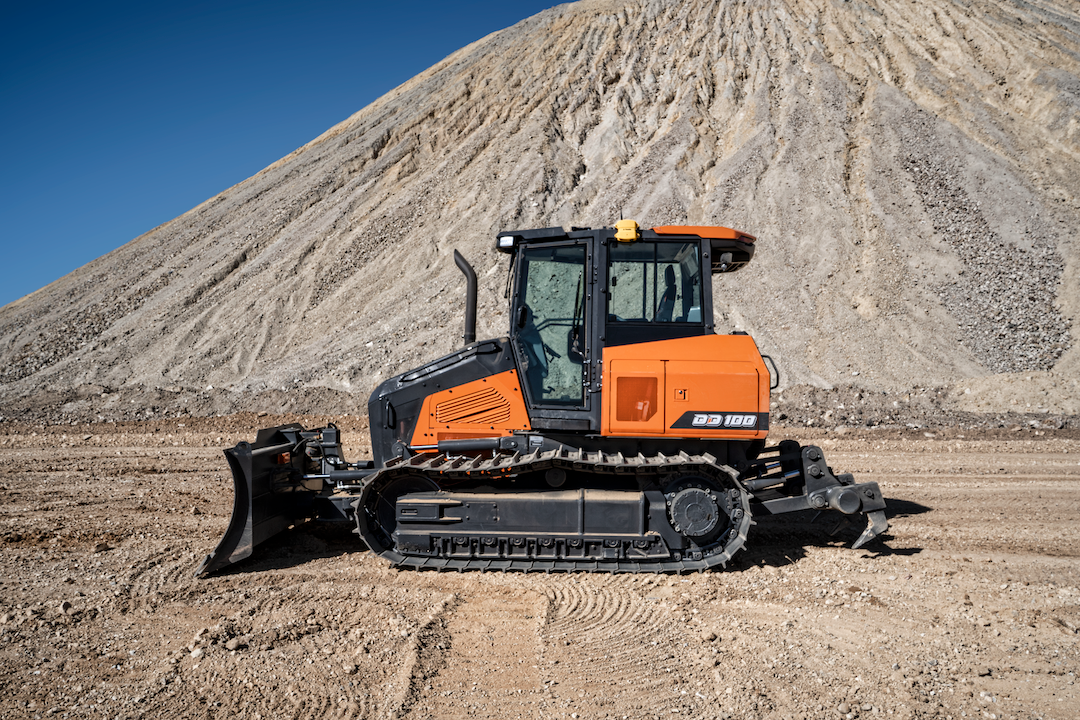
Doosan unveiled a “pre-prototype” of the DD100 dozer recently at the company’s testing grounds near Tucson, Arizona. (A video of the dozer in action can be seen at the end of this story.)

The dozers are being developed and built in South Korea and will be shipped to the United States. A 10-ton model is expected to arrive in the third quarter next year. A 13-ton model is slated for mid-2023.

“It’s something dealers have asked for, to help expand their business and help with their rental fleets,” said Aaron Kleingartner, Doosan product and dealer marketing manager, during a media event in Arizona. “We’re excited to see what this particular product category can do for us.”

Preliminary specs on the DD100 dozer are likely to change, but so far it runs on a 122-horsepower Doosan diesel engine that does not use a diesel particulate filter.

The company hopes to capture a portion of the $2.1 billion U.S. dozer market, 45% of which is made up of machines under 140 horsepower, Kleingartner says. The dozer additions will also give Doosan dealers and their customers a “one-stop shop” for their construction equipment needs, he said.


Doosan’s DD100 prototype dozer has a 122-horsepower engine with no diesel particulate filter.DoosanKleingartner summed up the company’s goals for the new dozers:

“We want to make sure we have low maintenance costs, superior power and traction, excellent visibility, and safe and easy operation. Those things are all going to be the requirements for us to be able to provide the opportunity for our customers to make the switch into this new product category.”

The cab, with lots of glass for better visibility, will be similiar to the company’s new line of excavators and wheel loaders. Controls will also be similar. Visibility is further increased by a narrow front engine box, and Doosan hid the air-intake pre-cleaner under the hood so it won’t block the operator’s view.  

Other standard features include an 8-inch touchscreen display, rearview camera, front and rear LED lights, and rear side wiper blades. It will have keyless entry and push start.

Doosan DD100 dozer unveiled
Doosan sought to improve operator visibility with lots of glass and by moving the air-intake pre-cleaner under the hood.Equipment WorldThe dozer blade will be six-angle, variable pitch. The standard blade will have a capacity of 2.9 cubic yards, and for the LGP model, 3.4 cubic yards.  

The company says it has an agreement with Trimble to install mastless 3D machine control as an option. The controls will be standard electro-hydraulic, and the operator will be able to adjust control speed.

Mooyoung Park, Doosan engineering manager, said Doosan was mindful of the U.S. labor shortage and is designing the dozers to be easy and comfortable to operate. Safety features include a seat with an automatic cut-off sensor, so when the operator stands up, the machine will stop.

Doosan DD100 dozer debuted in U.S.
Doosan hopes to capture a share of the under-140-horsepower dozer market with new models for 2022 and 2023.DoosanThe DD100 model, which the company rolled out at its Arizona testing grounds, is expected to undergo changes in the development process before mass production. 

The concept model was a low ground pressure version weighing 25,000 pounds. The standard model will weigh about 22,000.

“So our machine is a little bit heavier than the competition, and being a heavier machine,” Park said, “you’ll have more tractive effort to accommodate the power.”

Other preliminary specs on the DD100 prototype:

Blade height: 3 ft. 7 in. Blade width: 8 ft. 10 in. Blade angle: 22.5 degreesDrawbar pull: 33,721 pound-feetTrack length: 7 ft. 7 in.Travel speed, max: 5.7 mph 

Check out the video below to watch the prototype DD100 in action:

CMSBrowserComponents.load({ el: ‘#vue-1638830562551-115’, name: ‘OEmbed’, props: {“mountPoint”:”/__oembed”,”url”:”https://youtu.be/k_p3PJHu-Vg”,”attrs”:{“type”:”oembed”,”id”:”https://youtu.be/k_p3PJHu-Vg”,”element”:”aside”}}, hydrate: false });

Did you miss our previous article…
https://www.3555pacific.com/?p=697

Construction Management

How to Hang Christmas Lights Correctly

Everyone loves the warm glow of Christmas lights in the dark months of the year. However, setting them up correctly can be a daunting task if you don’t approach it with a plan. To make things easier, we’re sharing some tips for setting up your yuletide display for success.

Plan your design and make your budget

When you are starting a project like this, it’s an excellent first step to establish a budget. You want to make sure that your joyous display is something that’s going to continue to spark joy, not something that you finished over your estimate. Going in, knowing your number is going to make sure that you’re happy with your result.

As you’re looking around your property, you’re going to want to know how much a given area will need. A good rule of thumb is that you’ll need 100 lights for every 1.5 feet of tree or shrub that you’re hanging, and you can use a similar figure for covering 1.5 square feet of roof or siding. This will help you get your head around how much design you have to play within your budget.

Where are you going to place your lights?
When you’re placing your Christmas lights, you want to start by establishing a few features of your house or property that are going to be focal points of your design. Many houses are asymmetrical or weighted more heavily on one side or the other, which is frequently offset by the architect with architectural or landscape features, but the asymmetry may look awkward if you just light up everything.

Good places for focal points tend to be windows, large trees, door frames, pillars, posts, and the eaves but try to pick only one or two to focus around and leave the other areas less fully populated to emphasize the places where you’ve put in the work. Window boxes and planters that you already have are also usually instinctively placed around these areas and can be lit up to accent the features they’re near. If you’re hanging and you feel like something’s off-balance, don’t be afraid to subtract lights from the side that feels too heavy. Taking away something is free, but adding more things can be a lot of work while only making the problem worse.

Carefully choose the lights you plan to hang

Your power supply and the type of lights you choose can also determine how much lighting you can afford in your design. For example, a lot of people favor incandescent bulbs for their warm glow. However, these lights tend to overheat if left on for an extended time, and you are only likely to be able to attach three to six light strands per outlet, which means that you have to be more strategic in your placement and more attentive to when you turn them off.

If you are looking to be more ambitious with your lighting designs, it’s likely that you’ll want to go with LED string lights, which can fit up to 25 strands per outlet on most standard circuits. They also don’t overheat as much and are much more energy efficient. However, regardless of which type you choose, you want to make sure to buy all your lights in a single type or color at a time as year-to-year variations in manufacture can lead to mismatched lights, which will make your display less peaceful.

For expanding beyond your initial wiring system, there are weatherproof battery-powered light packs of both varieties. However, these need frequent maintenance, and you’ll want to make sure you have backup rechargeable batteries on hand to keep those lights running night in and night out. Otherwise, a significant portion of your carefully plotted design could go down.

Numerous lighting styles are available

For different effects, you may want to pick different sizes of lights. The largest lights are C9 Christmas lights (1¼ inches diameter and 2½ inches tall), while smaller ones are available down to C7 (¾ inch diameter and 1⅛ inches tall). Of course, a bigger light will provide brighter output and fill more space, so plan for the size of your light as you’re considering applications.

For roof lines, overhangs, and peaks, there are some styles that you might consider as an accent instead of a simple outline. For example, icicle and raindrop lights hang down in chains from a single line that attaches to the gutter or the drip edge and give a nice cascade effect in these areas.

It’s also worth considering whether you want to have twinkling or stationary lights. With programmable lights, the motion of light displays can get quite intricate. However, some people find these effects to be overwhelming. So be judicious about using them and consider exactly how much of your house or tree you want to be dancing. Done right, it can be lovely, while done wrong, it can be a bit much.

Don’t forget to gather all the tools you’ll need

Once you’ve got your design in place, you want to double check that you have the appropriate tools for the job. One of the first things you need to check is that all of your extension cords and lights are UL rated for outdoor use. If a light display isn’t safe, it will not be very effective at bringing peace and joy.

You’re also going to be working upon an elevated surface, so in addition to making sure that your extension ladder is in good repair, you’re also going to want to invest in a tool belt or over-the-shoulder bag. This ensures that your hands can remain free while climbing. You’ll also want your sturdiest and best traction shoes to make sure you stay ON the roof.

In your kit, you should avoid nails or staples whenever possible at all, instead of opting for plastic clips. There are a few different kinds of plastic clips which attach to the edge of shingles without going under or to the dripline or gutter.  Some of these clips combine simple hooks or latching hooks, and there are specific roof peak clips that attach to the side of the shingle while sitting on top of it. These will make removal easy come spring and prevent you from punching holes in the roof. Clips are generally sized to go with the size of your bulbs, so make sure you know whether you’re using C7 or C9 clips.

For vertical spaces like windows, columns, or the side of your house, there are adhesive clips that stick to the surface and allow you to hang lights vertically up the side of the building. These are great as for many applications. You can put them up without even getting on a ladder, and they let you adorn otherwise unavailable spaces.

Last, it’s very smart to invest in app-controlled smart plugs or timer plugs that will save on your electricity bill and prevent you from leaving them on. If you’re using a smart plug, make sure your internet is secured, as you don’t want to find out if you have a mischief-maker in the neighborhood.

Check roof condition and the weather forecast

When you’re ready to head up there, the first thing you absolutely need to check is what the weather is going to be. You should never work on a roof when it’s wet or uncleared, and you should plan to be up there for a few good hours, so check the weather report and look around at the clouds.

Get someone to help you

You have to have someone with you to hold your extension ladder as you head up after you’ve secured and leveled it. People hurt themselves every year by not asking someone to just do this one small thing, but you don’t have to be one of them.

Line up your lights

Untangle your lights on the ground, not up on the roof, and take the time to inspect and test each line. You’re going to be much better equipped to fix any problems with the lines and detect any fraying, loose bulbs, or damage when you’re not also trying to stay up on the roof. Once they’re untangled, carefully coil and pack them so that they come out of the bag or off the shoulder cleanly.

Clips need to go on first

As most people are rarely on their roof, you want to take the time to set up your clips first and make sure that you’re setting the shingles back correctly with no gaps underneath. Then, after that’s all set, you can return to string the lights knowing that you did the first job correctly.

Now that you have your lights all fixed up, you can enjoy their glow all season long, knowing that you’ve set yourself up for success and that come spring packing the kit away won’t be a huge problem. Of course, it’s also worth taking time to inspect your lines when they come down and to stow them away as untangled as you can get them.

The post How to Hang Christmas Lights Correctly appeared first on Mr Roof.

Did you miss our previous article…
https://www.3555pacific.com/?p=692